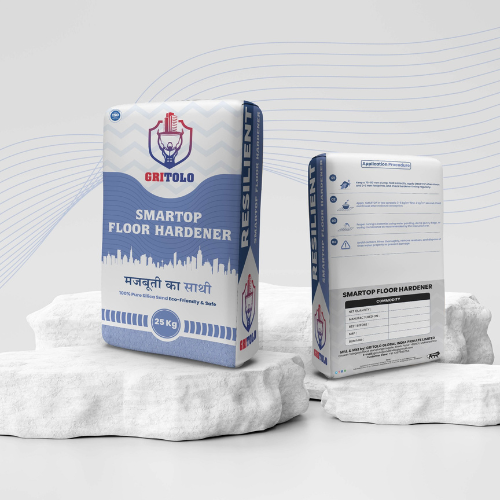
How to Apply Floor Hardener: Step-by-Step Process for Industrial Floors
Floor hardener has to go into the concrete while it’s still fresh — apply it too early and it sinks unevenly, apply it too late and it can’t bond properly, and either mistake shows up within months as dusting, pitting, or surface delamination under forklift and machinery traffic. The floor hardener application process for industrial flooring follows a tight sequence: place and finish the concrete, apply the hardener in two or three timed dry-shake passes as the surface reaches the right consistency, then power-float and cure it correctly — get the timing and dosage right, and the floor should resist abrasion, impact, and chemical spills for well over a decade; get it wrong, and even a premium hardener product won’t save the floor.
This guide walks through the complete process — what floor hardener actually does, the tools you need, the exact application sequence with timing cues, dosage rates by traffic class, and the mistakes that cause most on-site failures.
What Floor Hardener Does and Why Industrial Floors Need It
Floor hardener is a dry-shake or liquid-applied material — typically made from specially graded aggregates (quartz, emery, or metallic particles) combined with cement and additives — that gets worked into the top surface of fresh concrete to create a dense, wear-resistant top layer. Ordinary concrete, on its own, has a relatively soft and porous surface that dusts, pits, and erodes under sustained heavy traffic, forklift wheels, dragged pallets, and impact from dropped tools or materials.
Industrial floors — warehouses, factories, loading bays, workshops, cold storage facilities — face exactly this kind of stress every day. Without a hardener, plain concrete floors typically show visible wear, dusting, and surface degradation within 1-3 years of heavy use, which then requires costly resurfacing or epoxy overlays. A properly applied floor hardener increases surface density and abrasion resistance significantly, extending the floor’s service life well beyond what plain concrete can achieve, while also improving impact resistance and, in the case of metallic hardeners, resistance to point-loading from heavy machinery legs and racking systems.
Types of Floor Hardener
Choosing the right type matters as much as applying it correctly, since different traffic conditions call for different formulations.
Non-metallic (mineral) floor hardener — made from graded quartz or emery aggregate. This is the standard choice for most warehouses, factories, and general industrial floors. It’s cost-effective, widely available, and performs well under typical wheeled and foot traffic. Smartop’s standard range falls into this category.
Metallic floor hardener — uses fine iron or steel aggregate instead of quartz, giving significantly higher abrasion and impact resistance. This is specified for the most demanding environments — heavy manufacturing floors, steel mills, areas with constant heavy machinery movement, or high-impact zones. It costs more than mineral hardener but performs better under extreme point-loads.
Coloured/decorative floor hardener — similar composition to standard mineral hardener but with integral pigments, often used where the floor needs both durability and a defined aesthetic (retail-adjacent warehouses, showroom-attached facilities).
Liquid (chemical) floor hardeners — a different category entirely; these are penetrating silicate- or siloxane-based treatments applied to cured concrete rather than fresh concrete. They densify the surface chemically but don’t add the same abrasion resistance as a dry-shake hardener. Often used as a secondary treatment or for existing floors where dry-shake application isn’t possible.
For most new industrial floor pours, dry-shake mineral hardener remains the standard specification — it delivers strong abrasion resistance at a reasonable cost, applied directly during the concrete placement process.
Pre-Application Requirements
Before any hardener goes down, a few conditions need to be right, since floor hardener performance depends entirely on the base concrete it’s bonding to.
Concrete mix design. The base concrete should have adequate cement content and a controlled water-cement ratio — excess water in the mix causes bleeding, which interferes with proper hardener bonding and can lead to surface delamination (a defect commonly called “blistering” or “delamination,” where the hardened top layer separates from the base slab).
Timing window. This is the most critical variable. Floor hardener must be applied while the concrete is still plastic enough to accept and bond with the material, but firm enough to walk on with knee boards without significant indentation. This window typically falls a few hours after placement, depending on ambient temperature, humidity, and the concrete mix — hot weather shortens the window considerably, sometimes to under two hours, while cooler conditions extend it.
Weather conditions. Avoid application during rain, and be cautious in very hot or windy conditions, which accelerate surface drying and shrink the usable application window. Where possible, schedule large pours for cooler parts of the day or use temporary shading.
Base slab preparation. The slab should be placed, screeded, and bull-floated to a true, level surface before hardener application begins — hardener cannot correct an unlevel or poorly finished base slab.
Tools and Equipment Needed
- Power float (disc float) and power trowel (blade attachment) — for the mechanical floating and troweling passes
- Hand floats and knee boards — for edge work and areas the power equipment can’t reach
- Spreading tools or mechanical spreaders — for even, controlled hardener distribution
- Straightedges and levels — to confirm the base slab finish before application
- Curing compound sprayer — for applying membrane-forming curing compound immediately after finishing
- Moisture/weather monitoring — to track ambient conditions and adjust timing
Step-by-Step Floor Hardener Application Process
Step 1 — Place and screed the concrete. Pour the base concrete to the specified thickness and screed it to the correct level. Bull-float the surface to close any surface voids and bring a thin layer of cement paste (laitance) to the top, which the hardener will bond into.
Step 2 — Wait for the first application window. Once the bleed water has evaporated from the surface and the concrete can support a person on knee boards with only slight indentation, it’s ready for the first hardener pass. This typically happens a few hours after placement — judge by surface condition, not the clock, since conditions vary by weather and mix design.
Step 3 — Apply the first dry-shake pass (roughly two-thirds of total dosage). Broadcast the hardener evenly by hand or mechanical spreader across the surface. Uneven distribution at this stage is one of the most common causes of patchy, inconsistent wear resistance later, so take care to spread in a controlled, criss-cross pattern rather than random scattering.
Step 4 — Float the first pass into the surface. Use a power float (disc mode) to work the hardener into the concrete, allowing it to absorb residual moisture from the slab and bond into the top layer. This first floating pass should fully wet out and integrate the hardener — no dry material should remain visible on the surface.
Step 5 — Apply the second dry-shake pass (the remaining one-third of dosage). Broadcast the second, lighter application, ideally in a direction perpendicular to the first pass, to fill in any spots the first pass missed and even out coverage across the full floor area.
Step 6 — Float the second pass. Power-float again until the second application is fully absorbed and the surface is uniform in colour and texture, with no dry or dusty patches remaining.
Step 7 — Power trowel to finish. Once the floor has firmed up further, switch to trowel blades (starting with a flatter blade angle, moving to a steeper angle for later passes) to compact and close the surface, producing a dense, smooth, hard-wearing finish. Multiple trowel passes, timed as the concrete continues to set, produce the best final density.
Step 8 — Cut control joints. Once the floor is firm enough to walk on without marking (typically the same day or early the following day, depending on conditions), saw-cut control joints at the specified spacing to manage shrinkage cracking. Timing this correctly — not too early (raveling the edges) and not too late (random cracking before cutting) — is a skill in itself.
Step 9 — Apply curing compound immediately after finishing. As soon as final troweling is complete, apply a membrane-forming curing compound evenly across the entire floor. This step is frequently rushed or skipped on tight schedules, and it directly undermines the hardener’s performance — proper curing is what allows the hardened surface layer to fully develop its strength.
Step 10 — Protect the floor during initial curing. Restrict traffic for the first few days, and avoid covering the floor with plastic sheeting or materials that trap moisture unevenly, which can cause blotching.
Dosage Rates by Traffic Class
Dosage should match expected floor use — under-dosing leaves a floor vulnerable to premature wear, while over-dosing wastes material without proportional benefit.
| Traffic / Use Case | Typical Dosage Range |
|---|---|
| Light industrial / light foot & trolley traffic | Approximately 3-4 kg per sq m |
| Standard warehouse / forklift traffic | Approximately 4-6 kg per sq m |
| Heavy-duty industrial / constant machinery movement | Approximately 6-8 kg per sq m |
| Extreme-duty (metallic hardener, steel mills, high-impact zones) | Approximately 8-10+ kg per sq m (metallic aggregate) |
These are general planning ranges — always confirm exact dosage recommendations against the specific product’s technical data sheet, since formulations vary, and under- or over-application both affect long-term performance.
Curing After Application
Curing is where a well-applied floor hardener either reaches its full potential or falls short of it. Once finishing is complete:
- Apply a membrane-forming curing compound uniformly across the entire surface immediately after final troweling — delays of even a few hours can allow surface moisture loss that weakens the hardened layer.
- Maintain curing conditions (avoiding rapid drying, direct hot sun, or strong drafts across the floor) for at least 7 days.
- Keep the floor free of vehicle and heavy foot traffic during the initial curing period — early loading is a common cause of surface indentation and reduced long-term durability.
- In hot or dry climates, consider additional curing measures (fogging, extended compound application) since rapid evaporation is more aggressive in Indian summer conditions than the standard curing guidance (often written for temperate climates) accounts for.
Common Mistakes That Cause Floor Hardener Failure
- Applying too early or too late. Both timing errors compromise bonding — too early and the hardener sinks and segregates; too late and it sits on top without integrating into the slab, leading to delamination under load.
- Uneven broadcasting. Patchy application creates soft spots that wear faster than the surrounding floor, visible as uneven discolouration or texture within the first year of use.
- Skipping or delaying curing compound application. This single shortcut is responsible for a large share of premature dusting complaints on otherwise correctly applied floors.
- Using the wrong hardener grade for the traffic load. Specifying a light-duty mineral hardener for a floor that will see constant heavy machinery traffic leads to accelerated wear regardless of how well the application itself was executed.
- Poor base concrete quality. A hardener cannot compensate for a weak, high-water-content, or poorly finished base slab — the two need to be specified and executed together.
- Incorrect joint-cutting timing. Cutting too early causes edge raveling; cutting too late allows random cracks to form before the saw-cut can control them.
Cost Considerations
Floor hardener project costs depend on dosage rate, hardener type (mineral vs metallic), floor area, and finishing complexity. As a general planning guide:
- Material cost for standard mineral floor hardener typically runs in a moderate per-sq-m range, scaling with dosage rate — heavier-duty applications naturally cost more due to higher material quantity, not a different price per kg.
- Metallic hardener commands a noticeably higher material cost than mineral hardener, reflecting the aggregate cost difference, but is justified where extreme abrasion or impact resistance is required.
- Labour and equipment cost (power float/trowel operation, finishing crew) is often comparable to or exceeds material cost on smaller floor areas, since skilled finishing labour and equipment time don’t scale down proportionally with area.
- Total project cost should always be evaluated against the cost of floor failure and resurfacing — a floor that dusts and pits within 2-3 years typically costs significantly more to repair or overlay than the incremental cost of correct hardener specification and application upfront.
For an accurate quote tailored to your floor area and traffic class, it’s best to share project specifics directly with a supplier rather than rely on generic per-sq-m estimates, since dosage and finishing complexity swing the numbers meaningfully.
Maintenance After Installation
- Sweep or dust-mop regularly to remove abrasive grit that would otherwise accelerate surface wear.
- Avoid harsh acid-based cleaning chemicals unless the hardener and any sealer applied over it are rated for chemical resistance.
- Reapply a floor sealer periodically (typically every few years, depending on traffic) to maintain surface density and ease of cleaning, especially in floors exposed to oil, grease, or chemical spills.
- Monitor control joints and reseal them if they show signs of spalling or debris accumulation, since damaged joints are a common secondary source of localized floor wear.
Regional Considerations for Indian Industrial Sites
Climate has a real effect on floor hardener application timing and outcomes, and it’s worth planning around rather than treating every site the same.
Hot, dry regions (Rajasthan, interior Maharashtra, Gujarat in summer) compress the application window significantly — high ambient temperatures accelerate surface drying, sometimes shrinking the workable gap between placement and the first dry-shake pass to under two hours. Scheduling large pours for early morning, using temporary shade structures, and having the finishing crew ready to move quickly all help avoid a rushed, uneven application.
Monsoon-season sites (most of India, June-September) need careful weather monitoring, since rain on fresh, unhardened concrete can wash out surface material entirely. Large industrial pours during monsoon months should be scheduled around forecast windows, with tarping and drainage plans ready in case conditions shift mid-pour.
High-humidity coastal sites (Mumbai, Chennai, Kerala) slow surface drying, which can extend the application window but also increases the risk of extended curing times and delayed joint-cutting readiness — schedules built around dry-climate timing benchmarks often run long in these conditions.
Cooler winter mornings in North India can also extend the workable window, which is generally favourable, but cold surface temperatures can slow cement hydration and extend the time before the floor is ready for trowel finishing and joint cutting.
Quality Control Checks During and After Application
A few checks during the process catch problems while they’re still fixable, rather than after the floor has cured and failed.
- Surface sounding test — lightly tap the finished surface with a hammer or chain-drag device once cured; a hollow or drummy sound indicates delamination between the hardener layer and base slab, which needs to be flagged and addressed before handover.
- Colour and texture uniformity check — inspect the finished floor under raking light (low-angle lighting) to spot patchy or inconsistent hardener distribution that may not be obvious under normal overhead lighting.
- Dusting test after curing — wipe a small section of the cured floor with a dark cloth; excessive dust transfer suggests inadequate curing or under-dosed hardener application.
- Joint spacing and cutting depth verification — confirm control joints were cut to the specified depth (typically around a quarter of the slab thickness) and spacing, since incorrect joint layout is a common source of uncontrolled cracking discovered only after the floor is in service.
- Documentation — keep records of dosage rates used, ambient conditions during application, and curing compound application timing for each pour, which is invaluable if a warranty claim or defect investigation comes up later.
Frequently Asked Questions
What is the correct time to apply floor hardener after concrete placement? Floor hardener should be applied once bleed water has evaporated and the concrete can support knee boards with only slight indentation — typically a few hours after placement, though the exact timing depends on temperature, humidity, and the concrete mix, so it’s judged by surface condition rather than a fixed clock time.
How much floor hardener is needed per square meter? Dosage typically ranges from around 3-4 kg per sq m for light-duty floors up to 6-8 kg per sq m for heavy industrial traffic, with metallic hardeners for extreme-duty applications sometimes exceeding this range — always confirm exact figures against the product’s technical data sheet.
What’s the difference between metallic and non-metallic floor hardener? Metallic floor hardener uses iron or steel aggregate for higher abrasion and impact resistance, suited to extreme-duty environments like steel mills, while non-metallic (mineral) hardener uses quartz or emery aggregate and is the standard, cost-effective choice for most warehouses and general industrial floors.
Can floor hardener be applied to existing, cured concrete floors? Dry-shake floor hardener needs to be applied to fresh concrete to bond properly into the surface; for existing cured floors, liquid penetrating hardeners or a full resurfacing/overlay system are the appropriate alternatives instead.
How long does floor hardener take to cure before the floor can be used? The floor typically needs a minimum of 7 days of proper curing before being exposed to full traffic, though light foot traffic may be possible sooner depending on site conditions and the specific curing method used.
What causes floor hardener to fail or wear unevenly? The most common causes are incorrect application timing, uneven broadcasting, skipped or delayed curing compound application, using an under-specified hardener grade for the actual traffic load, and poor-quality base concrete that the hardener cannot compensate for.
Does floor hardener eliminate the need for a floor sealer? No, floor hardener provides the primary abrasion and wear resistance within the concrete surface itself, but a sealer applied afterward adds chemical resistance and easier maintenance, and is generally recommended for floors exposed to oil, grease, or frequent chemical contact.
Final Thoughts
Floor hardener application is a timing-and-technique process as much as a materials one — the same product can deliver a decade of reliable performance or fail within a year, depending entirely on whether the dry-shake passes, floating, troweling, and curing were executed correctly during that narrow window while the concrete is still workable. Getting a qualified, experienced flooring crew to execute the sequence precisely matters just as much as choosing the right hardener grade for your traffic load.
If you’re specifying floor hardener for an upcoming industrial project and want dosage recommendations or a technical data sheet for Smartop Floor Hardener, get in touch with our team for project-specific guidance.