AAC Block Construction in India: 7 Common Mistakes and How Block Jointing Mortar Fixes Them
The most common AAC block construction problem in India is using traditional cement-sand mortar in 12–18 mm joints instead of polymer-modified block jointing mortar in 2–3 mm thin joints. AAC blocks are precision factory-cut for thin-bed jointing — thick mortar beds trap moisture, add dead load, and produce joint cracking that the correct mortar prevents entirely. Six further mistakes compound this first one.
What goes wrong when AAC blocks are laid with traditional cement mortar — and what should contractors use instead? The short answer is that AAC blocks were engineered for thin-bed polymer-modified jointing mortar, not for the thick cement-sand beds designed for clay bricks. Every mistake in this article flows from treating a precision-engineered product like an improvised one.
India’s AAC block market is growing at roughly 9.5% CAGR and is now specified by default on most new residential and commercial projects across Maharashtra’s cities. But adoption of the correct jointing mortar has not kept pace with block adoption — which is precisely why cracked joints, hollow walls, and structural issues continue to appear on projects where the blocks themselves are perfectly good.
This guide covers the seven mistakes Gritolo’s technical team sees most frequently on Indian AAC block sites, with the specific fix for each one.
Why AAC Blocks Are Fundamentally Different from Red Bricks
Understanding the mistakes requires first understanding the material. Autoclaved Aerated Concrete blocks are manufactured under high-pressure steam at controlled temperatures, producing a cellular, lightweight structure with properties that differ from red clay bricks across every dimension that matters for jointing mortar selection:
| Property | AAC Block | Red Clay Brick |
| Density | 550–650 kg/m³ | 1,800–2,000 kg/m³ |
| Block size (typical) | 600×200×100 to 200 mm | 230×115×75 mm (standard Indian brick) |
| Water absorption | Less than 10% | 15–20% (high absorption) |
| Thermal conductivity | 0.16–0.18 W/mK (excellent insulator) | 0.6–0.8 W/mK (poor insulator) |
| Compressive strength | 3–5 N/mm² (IS 2185 Part 3) | 3.5–7 N/mm² (varies widely) |
| Surface texture | Smooth, precision factory-cut | Rough, variable handmade surface |
| Correct mortar joint | 2–3 mm (block jointing mortar) | 10–15 mm (cement-sand mortar) |
| Mortar type required | Polymer-modified block jointing mortar | Traditional cement-sand 1:4 to 1:6 |
| Curing mortar joints | Minimal — 2–3 days light misting | Active water curing 5–7 days |
The critical figures for jointing mortar purposes are density (550–650 kg/m³ versus 1,800+ kg/m³ for brick), water absorption (below 10%, but highly capillary at the surface), and the correct joint thickness (2–3 mm, not 12–18 mm). Every mistake below traces back to ignoring at least one of these three differences.
Mistake 1: Using Thick Cement Mortar Joints — Why 2–3 mm Is the Correct Thickness
The most prevalent AAC block construction problem across Indian sites is applying cement-sand mortar in 12–18 mm beds, exactly as masons have always done for red clay bricks. This single error causes more AAC wall failures than all the other mistakes combined.
AAC blocks are factory-cut using wire saws to tolerances of ±1–2 mm, specifically so that 2–3 mm thin-bed joints are possible. The dimensional precision of the block is the engineering reason the thin joint works. When a contractor applies a 15 mm mortar bed over this precision block, they are:
- Adding significant dead load — a 200mm thick AAC block wall with 15mm cement joints carries substantially more mortar weight per square metre than the block specification was designed for.
- Trapping moisture in a thick, poorly aerated bed that the dense AAC surface cannot easily absorb and release — creating persistent wet zones that weaken the joint over months.
- Introducing inconsistency — hand-mixed cement mortar applied in thick beds varies in ratio, density, and shrinkage characteristics from course to course and mason to mason, leading to differential shrinkage and joint cracking.
- Wasting the precision the AAC block was manufactured for — the factory paid for that dimensional accuracy; the thick mortar bed ignores it entirely.
The Fix
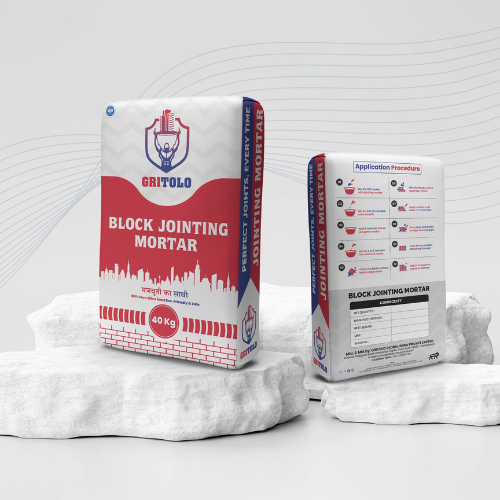
Specify Gritolo Block Jointing Mortar and apply at 2–3 mm using a notched trowel. A 40 kg bag covers up to 240 sq ft at 2mm — the material is not expensive and the coverage is excellent. The correct tool is a notched trowel (2–4 mm notch depth for AAC work), not a traditional brick trowel.
Mistake 2: Not Preparing the Block Surface Before Laying (Skipping SSD Condition)
AAC blocks have a porous surface that is highly capillary — meaning the block face will rapidly wick moisture from any material placed against it. When a mason places block jointing mortar on a bone-dry block surface in summer site conditions, the block draws moisture out of the mortar too quickly, before the polymer system has had time to hydrate and develop adhesion.
The result is a dry, friable joint that looks set but has not properly bonded — it crumbles under finger pressure, separates cleanly from the block face, and provides essentially no tensile strength across the joint. This is one of the most common causes of AAC wall joint cracking reported from sites across Pune and Mumbai.
The Fix
Lightly dampen the block face with water before applying jointing mortar to achieve SSD (Saturated Surface Dry) condition — the surface should feel cool and damp to the touch, with no standing water visible. This takes 30 seconds per block and eliminates the premature moisture loss that causes weak joints. In hot weather, dampen the preceding course as well before laying the new course on top of it.
Mistake 3: Wrong Water-Cement Ratio in the Jointing Mortar Mix
Block jointing mortar is a factory-controlled product supplied in a bag. Its performance depends on being mixed at the correct water-to-powder ratio — approximately 27–30% water by weight (10–12 litres per 40 kg bag). Two errors are common in practice:
- Too much water: Adding extra water to improve workability is the most frequent error. Excess water weakens the final bond strength, increases shrinkage as the mix dries, and produces a runny consistency that does not maintain the 2–3 mm joint thickness under the block’s weight. Over-watered jointing mortar is one of the hidden causes of AAC wall joint cracking that contractors rarely identify correctly.
- Too little water: Under-watered mortar is stiff and difficult to apply in thin, even layers. Masons working with a stiff mix tend to increase joint thickness to compensate — which undermines the entire reason for using block jointing mortar over cement.
Never Re-Temper a Stiffening Batch
If a mixed batch of block jointing mortar begins to stiffen before it has been used, do not add extra water to extend its workability. Re-tempering destroys the polymer cross-linking in the mix and produces a weakened product that will not achieve design joint strength. Discard the batch and mix fresh. Always size batches to what can be used within the 1.5–2 hour pot life.
The Fix
Measure water accurately using a marked bucket before each batch. Add the powder to the water — not the reverse — and mix with a slow-speed mechanical paddle mixer for 3–5 minutes to a smooth, creamy consistency. Rest for 2 minutes to activate the polymer system, then remix briefly. Measure every batch; do not estimate by eye.
Mistake 4: Skipping or Rushing the Curing Period After Jointing
Traditional cement-sand mortar on clay bricks requires active water curing for 5–7 days. Many contractors assume the same applies to block jointing mortar — or alternatively assume that because block jointing mortar is polymer-modified it needs no attention at all after application. Both are wrong.
Block jointing mortar requires minimal but not zero curing. In the 2–3 days after laying, the joint should be protected from direct sunlight on exposed walls and lightly misted once or twice a day if ambient temperatures exceed 30°C or the wall is in a windy location. Allowing the joint to dry too rapidly — particularly on exterior walls in Pune’s April-June heat — produces surface crazing and shallow cracking that weakens the joint face even if the bond beneath is adequate.
The Fix
Light misting of laid courses for 2–3 days after jointing, particularly in hot or dry conditions. This does not require active water curing or soaking — simply protecting the joint from premature moisture loss during the initial polymer hydration period. On interior walls away from direct sunlight in moderate temperatures, this step is often not needed at all, but it costs nothing to apply on exposed walls.
Mistake 5 — Not Allowing for Structural Settlement Before First-Fix Finishes
AAC block walls are lightweight and stiff. When a new structure settles — particularly in the first monsoon season after construction, when soil moisture changes and foundation movement occurs — a wall with brittle, incorrect mortar joints will crack along the weakest joint line first. Walls laid with correctly applied block jointing mortar (which has compressive strength of up to 36.9 MPa and controlled flexibility) are better placed to accommodate minor structural movement without visible joint cracking. However, no mortar can compensate for inadequate foundation work or premature first-fix plastering applied before initial settlement has completed.
The fix: allow a minimum of 4–6 weeks after wall completion before applying plaster or fixing heavy wall-mounted items, particularly on new construction where foundation settlement is still progressing.
Mistake 6 — Using the Wrong Product at External Corners and Openings
External corners of AAC block walls and the jambs around door and window openings are high-stress zones — they concentrate impact loads (from doors, furniture, trolleys) and are the first areas to show chips, cracks, and joint failure. On many sites, these zones are simply laid with the same block jointing mortar as the main wall and left exposed or thinly plastered. The correct approach at corners is to either use purpose-made AAC corner blocks with additional reinforcing mesh embedded in the plaster coat, or to ensure an adequate thickness of polymer-modified plaster at these locations. Block jointing mortar does the joint; plaster does the surface protection — neither alone is sufficient at corners.
Mistake 7 — Ignoring Bond Beams at Specified Intervals
IS 2185 Part 3 and sound structural engineering practice for AAC block walls both recommend horizontal reinforced concrete bond beams at regular vertical intervals — typically every 600–900 mm of wall height and always at lintel level and floor levels. Bond beams distribute concentrated loads from slabs, lintels, and beams across the full wall length, preventing point-load cracking that AAC’s relatively low compressive strength cannot absorb unaided. On many smaller residential projects in Maharashtra, bond beams are either omitted for cost reasons or applied only at lintel level. Where settlement cracking then appears at mid-wall height, the missing intermediate bond beam is frequently the root cause.
What Is the Correct Block Jointing Mortar Coverage for AAC Blocks?
Here are the complete coverage specifications for planning purposes — whether you are estimating quantities for a tender or ordering materials for a running site:
| Parameter | Specification / Figure | Notes |
| Joint thickness | 2–3 mm (target) | 4–6 mm acceptable where blocks have more variation |
| Coverage at 2 mm | ~220–240 sq ft per 40 kg bag | Approx. 13 sq m per bag |
| Coverage at 3 mm | ~130–150 sq ft per 40 kg bag | Approx. 8 sq m per bag |
| Bags per 100 AAC blocks (600×200×200 mm @ 3mm) |
~2.5–3 bags | Based on 600×200 mm face area, 3mm joint |
| Mixing ratio (water) | ~27–30% by weight (10–12 L per 40 kg) | Always add powder to water |
| Pot life | 1.5–2 hours at 30°C | Mix smaller batches in peak summer |
| Initial set | 1.5–2 hours | Do not load wall within this window |
| Compressive strength @ 28 days | Up to 36.9 MPa | Exceeds IS 2185 block strength requirement |
| Water curing required | Minimal — 2–3 days light misting | No active water curing needed |
Bags Per Flat — A Useful Reference
A standard 2 BHK apartment with AAC block partition and external walls typically requires between 45–70 bags of 40 kg block jointing mortar, depending on total wall area, opening ratio, and target joint thickness. Contractors who have switched from cement-sand mortar often find the total masonry subcontract cost is comparable or lower once material transport, sieving labour, and curing supervision are removed from the traditional mortar workflow.
Frequently Asked Questions
Q1. Can block jointing mortar be used for red bricks too?
A1. No. Block jointing mortar is specifically formulated for the 2–3 mm thin joints of AAC blocks, fly ash bricks, and concrete blocks. Traditional red clay bricks require 10–15 mm mortar beds due to their dimensional variability — block jointing mortar is not designed for this thickness and will not perform correctly on red brick walls.
Q2. What is the correct joint thickness for AAC blocks?
A2. 2–3 mm is the correct target joint thickness for AAC block construction, achievable because AAC blocks are factory-cut to precise dimensional tolerances. Using traditional 12–18 mm cement mortar joints wastes material, adds dead load, and defeats the purpose of using precision-cut AAC blocks.
Q3. Why do AAC block walls crack at joints?
A3. Joint cracking in AAC walls is almost always caused by using traditional cement-sand mortar instead of polymer-modified block jointing mortar, incorrect water ratio in the mix, skipping surface SSD preparation before laying, or insufficient curing in hot weather. All are preventable with correct materials and technique.
Q4. How many bags of block jointing mortar do I need per 100 AAC blocks?
A4. Approximately 2.5–3 bags of 40 kg block jointing mortar per 100 standard AAC blocks (600×200×200 mm) at a 3 mm joint thickness. Coverage reduces proportionally if joint thickness increases beyond 3 mm.
Q5.Do AAC blocks need to be wetted before laying?
A5. Yes — lightly. Dampen the block face to SSD condition before applying jointing mortar. This prevents the porous AAC from drawing moisture from the mortar too rapidly, which would cause premature drying and weakened joint bond. Do not soak the block — a light surface misting is sufficient.
Q6. What is a bond beam in AAC block construction?
A6. A bond beam is a horizontal reinforced concrete element cast within the AAC block wall at regular intervals and at structural levels. It distributes loads across the wall and provides ductility against settlement and seismic movement. Bond beams are strongly recommended per IS 2185 Part 3 for AAC block walls, particularly in load-bearing applications.
Related Gritolo Resources
- Product page and TDS: Gritolo Block Jointing Mortar
- Full cost and coverage comparison: Block Jointing Mortar vs Traditional Cement Mortar: Cost, Coverage & Which to Use— see why block jointing mortar is comparable or cheaper per sq ft of finished wall
- After block laying comes plastering — read: Ready Mix Plaster vs Traditional Sand-Cement Plasterfor plastering over AAC blocks
- Browse all Gritolo construction materials: Gritolo Shop
For site-specific consultation, bulk orders, or technical data sheets: Contact the Gritolo Team | +91 7397985754
Author Bio
Gritolo Technical Team Construction Materials Specialists | Pune, Maharashtra
The Gritolo Technical Team is based in Pune and works directly with civil contractors, site engineers, and developers on AAC block construction projects across Maharashtra. Gritolo manufactures Block Jointing Mortar and Ready Mix Plaster in-house, and the mistake patterns described in this article are drawn from our direct site experience on residential and commercial AAC block projects — not generic industry commentary. If you have a specific AAC block wall problem you are investigating, our technical team is available for site consultation.
Contact us: https://gritolo.com/contact | +91 7397985754